Although Google Chrome is a popular web browser, sometimes it has problems. In the epoch of technology and remote working, such a small thing as a browser problem can cause some inconveniences. One of these errors is the “Server IP Address Could Not Be Found”. Since it is difficult to tell the exact cause of this error, today we will look at a some ways that should help solve this problem on Windows devices.
Check your Internet connection
First, you must find out if your device has Internet access. Just because you are connected to your router via Wi-Fi or a local network does not mean you are connected to the Internet. If you are not connected to the Internet, Chrome is not the problem. There’s an easy way to check for an Internet connection – use the ping command at the command line.
- From the Start menu, find Command Prompt and open it. This will bring up a blackboard known as the command line.
- At the command prompt, type ping google.com and press Enter. This command will ping google.com and return the results.
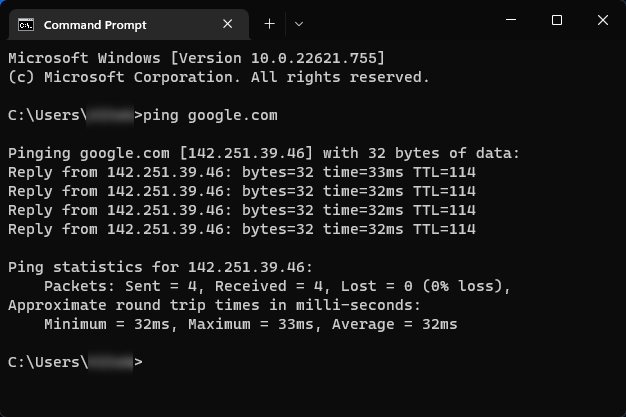
If your results match those in the screenshot above, there is nothing wrong with your connection. However, if you get the message “Request timeout exceeded” or other errors, you need to check your Internet connection further.
Check the website status
Sometimes, websites can go down for various reasons. It can be a DDoS attackor unexpected maintenance or failure. Use this item if you have no problems with your internet connection. If you check the status of the Web site and the Web site is unavailable, there is nothing you can do here until the Web site is available again. To avoid unnecessary troubleshooting of your system, follow these steps to ensure that the problem is not with the website. There are many services on the Internet to check if websites are up and running. Options include WebsitePlanet, IsItDownRightNow, or Downdetector. Choose any of these (or any other option) and enter the website address into the search box.
- Go to =https://isup.me=.
- Enter the address of the website you can’t connect to in the “Is [your website] down for everyone?” field and click Or just me? button or Enter.
Then you’ll see information about the availability of the website you’re interested in.
Use Windows Network Diagnostics
Suppose there is no problem with the accessibility of the website, but it still does not open. For example, you have problems with network configurations, that block Google Chrome from working. In this case, the Windows troubleshooter should be able to troubleshoot your configuration issues.
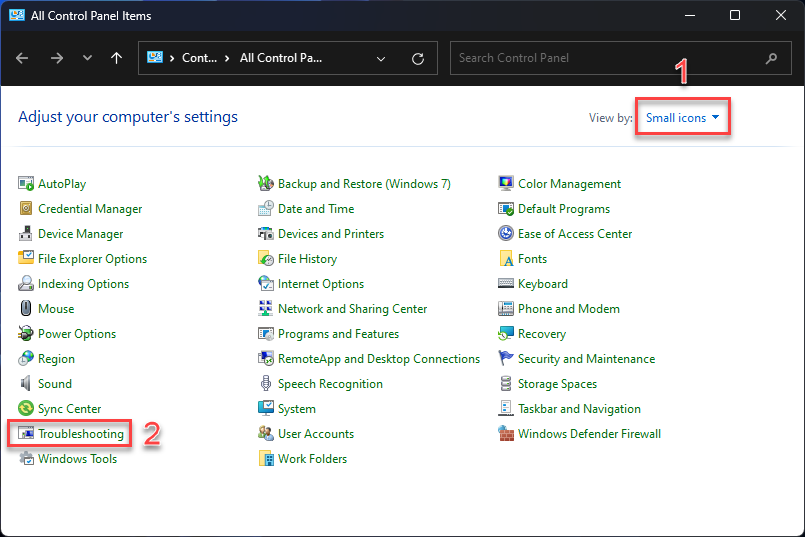
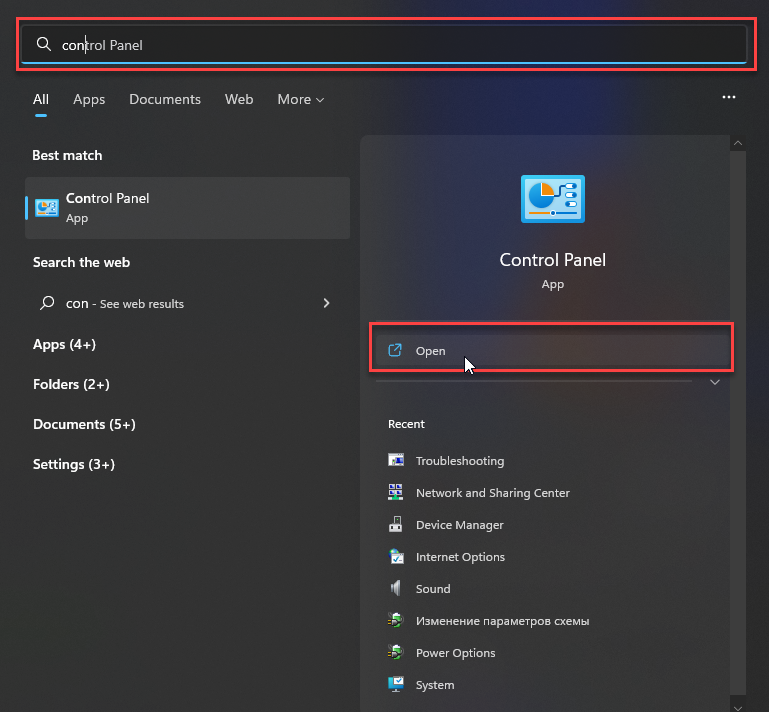
- the Start menu and search Control panel, than open it.
- Switch the view of the small icons.
- Click Troubleshooting.
- Click Connect to the Internet.
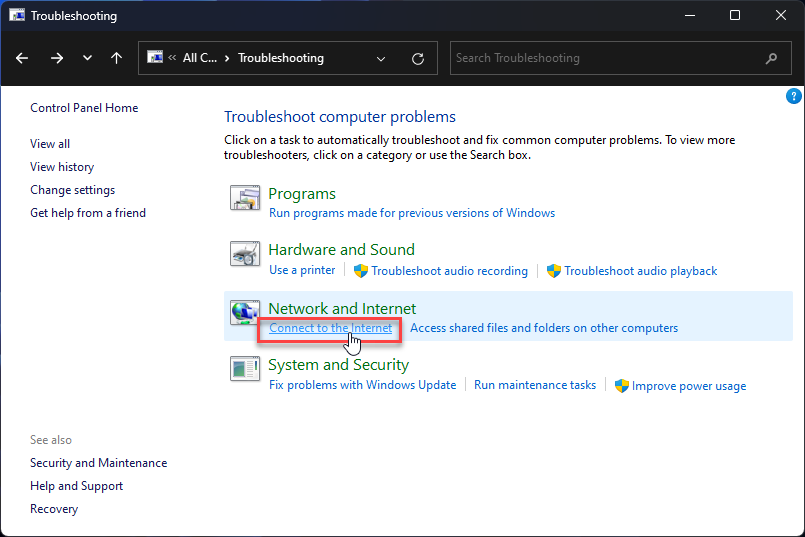
- Follow the instructions provided by the Troubleshooter. In most cases, the Troubleshooter can fix the detected problem independently. However, it can instruct you to fix the problem yourself if it has not had the
necessary privileges.
Check the hosts file
The hosts file is a regular text file that maps host names to IP addresses. It is part of every operating system, such as macOS, Windows, Linux, etc. Because there was no centralized and automated hostname resolution system before DNS, each computer or local network relied on its own hosts file, containing a list of known host names and their respective IP addresses.
However, with the implementation of DNS, computers can automatically obtain hostname addresses from the DNS network. Hence they are no longer dependent on this file. Nevertheless, the host file is still helpful and remains in current operating systems. Sometimes the HOSTS file can cause a “Server IP address could not be found” error. If the HOSTS file has been modified by malware or any other application, Repair it. When you use a hosts file to block websites, you should check its contents for the website of interest.
To check the hosts file, open an explorer and type C:\Windows\System32\drivers\etc in the address bar, then open the file with Notepad and ensure that the site you want is not blocked. To change the hosts file, do the following:
- Click Start and look for Notepad
- Run it as an administrator
- Click File > Open and type C:\Windows\System32\drivers\etc in the address bar
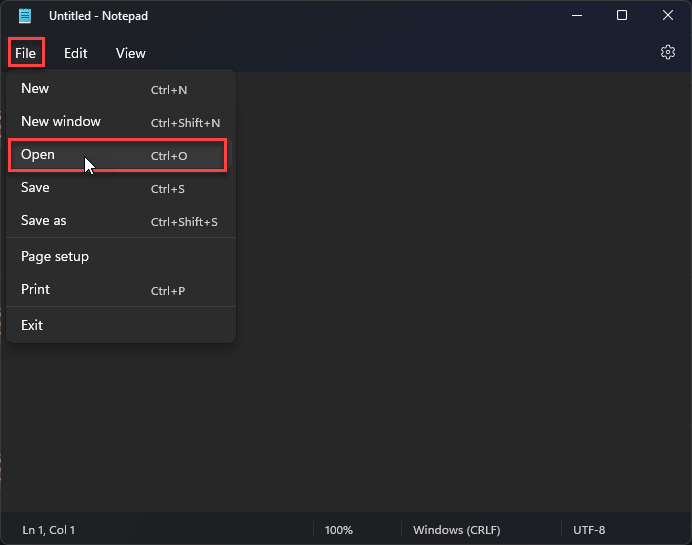
- From the Text documentsmenu, select All files
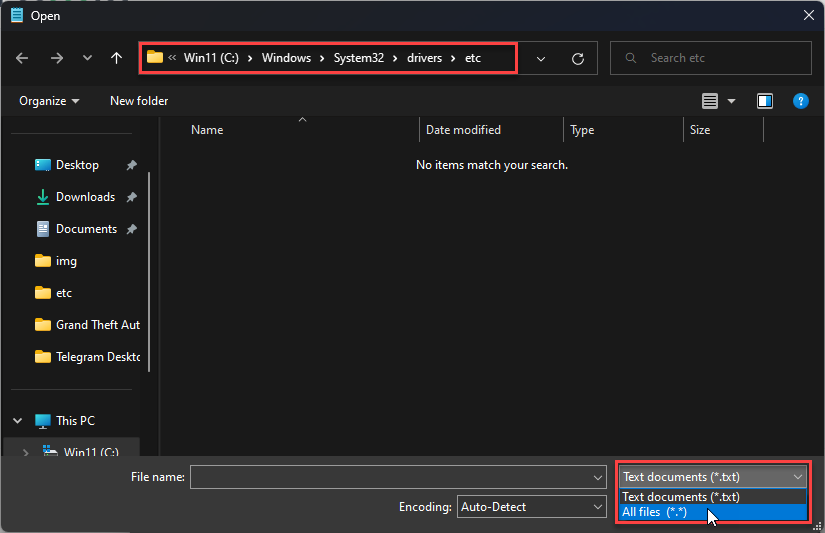
- Select hosts and click Open
- Make your changes and press CTRL+S
Check the proxy settings
Another cause of the error is a bad or incorrectly configured proxy server. For example, an application on your computer (or you) may have set up a proxy that is not working now. Try setting up a new proxy or disabling it in your proxy settings. Here’s how to do it:
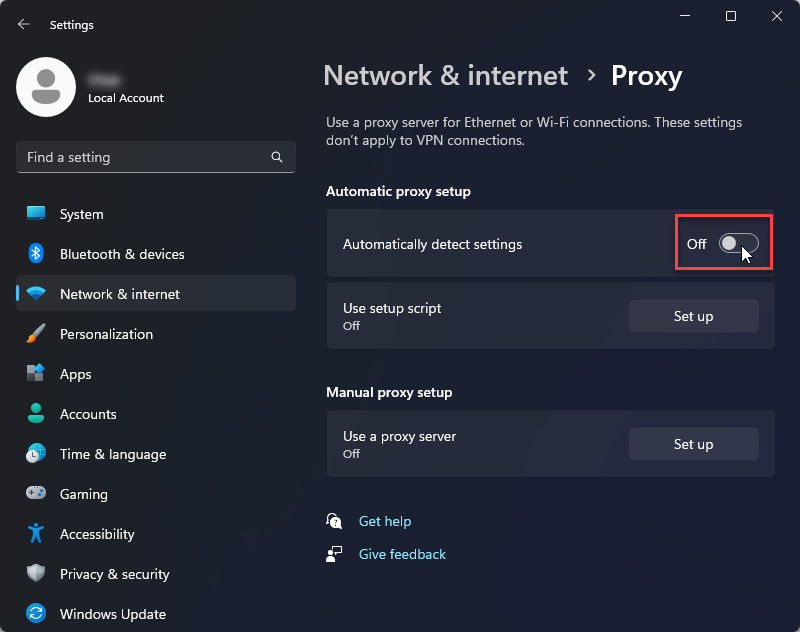
- Click Startand find Proxy.
- Turn off automatic detection of settings.
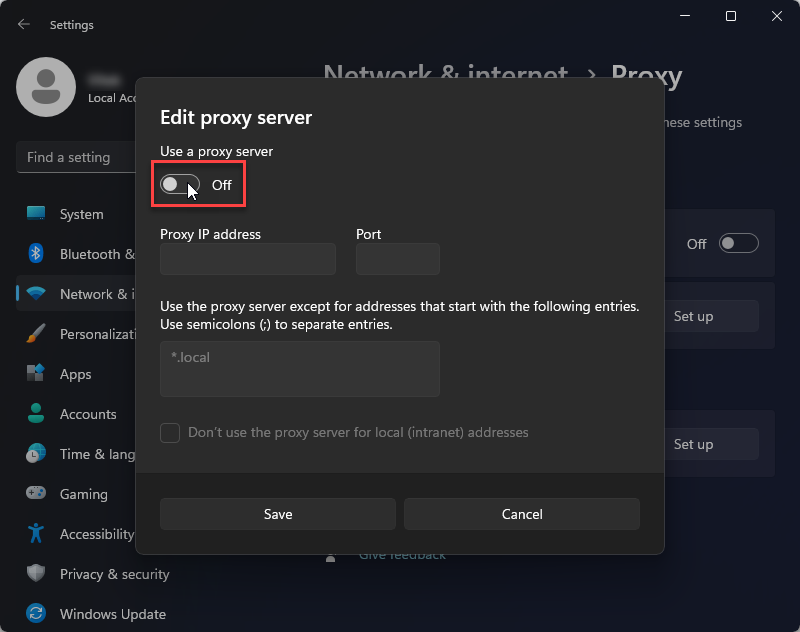
- Scroll down to Manual Proxy Settings and turn it off.
- Open Chrome and see if your problem is resolved. You can enable automatic detection of settings so that the system itself chooses the best settings.
Change the network adapter settings
If the problem is still observed, ensure your network adapter is configured correctly. By default, it is configured to use DHCP, allowing it to obtain an IP address automatically. However, if you have changed its settings, IP and DNS need to be entered manually. You can return the settings to DHCP from the control panel. To do this, do the following:
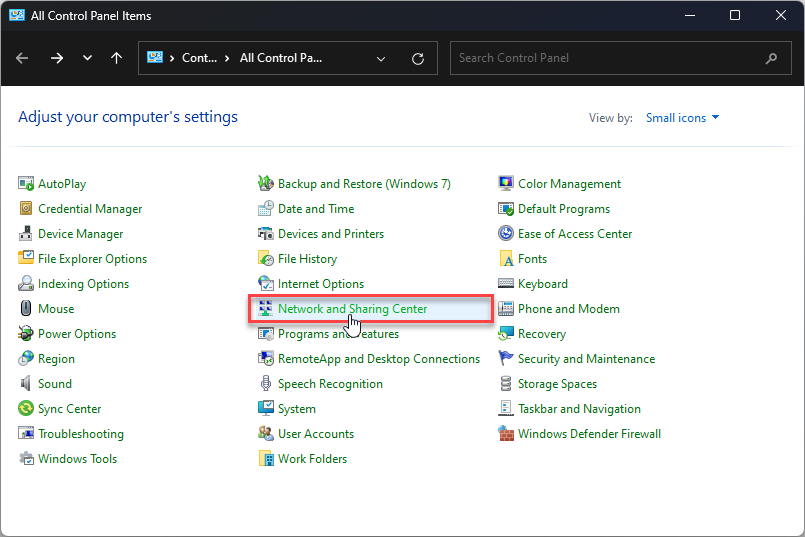
- Click Start and look up Control Panel.
- Select Network and Sharing Center.
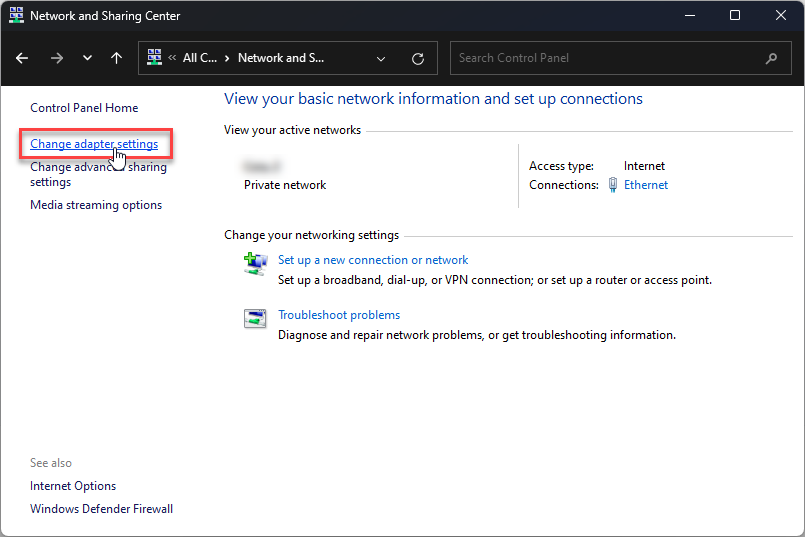
- Next, click Change Adapter Settings. Next, you will see all your network adapters.
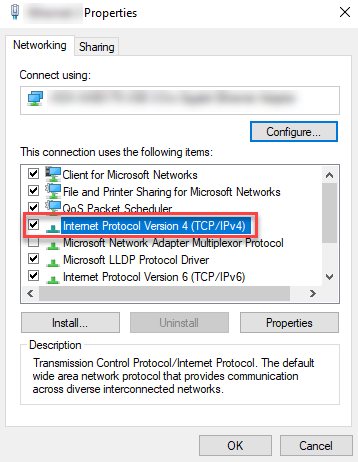
- Right-click the network adapter you are using and select Properties.
- Double-click IP version 4 (TCP/IPv4) to open its properties.
- Next, select Obtain DNS server addresses automatically.
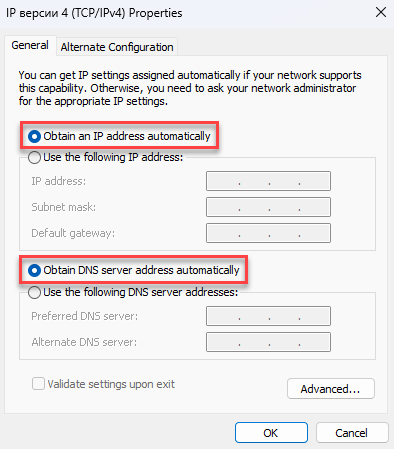
- Click OK to save your settings
- Open Chrome and see if your problem is resolved.
Update the network driver
Sometimes, the cause of network problems is the need for the proper drivers for your hardware. Windows 10 and 11 do a good job of automatically finding and installing drivers, but sometimes it finds an outdated and bugged version. To update your network drivers, your system must have access to the Internet (you can connect a phone via USB and turn on the Access point function) and then do the following:
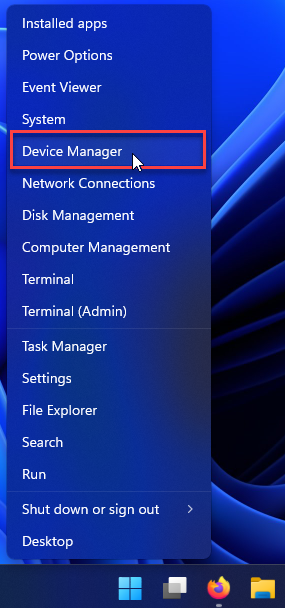
- Right-click Start, then select Device Manager.
- Expand Network Adapters, then right-click your adapter and select Update Driver.
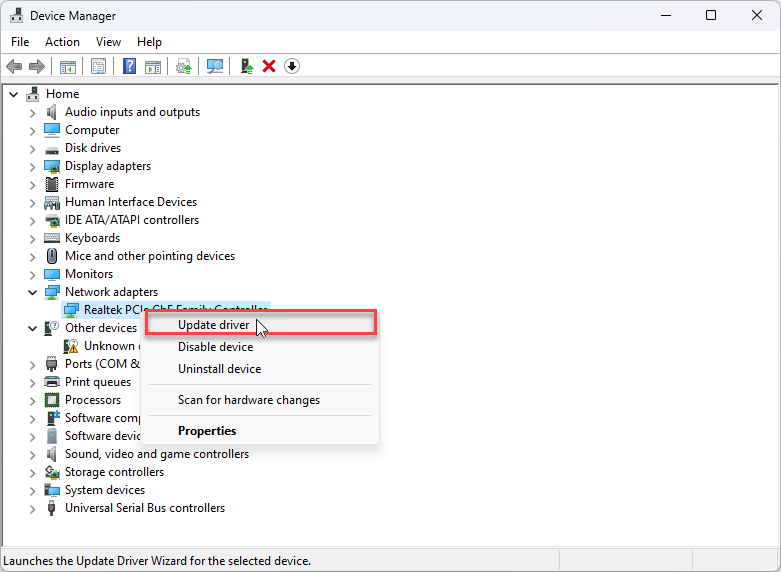
- Windows will try to find the correct driver in the system, then in the
Update Center. If a suitable driver is found, the system will install it.
Since drivers are rarely updated in the Windows Update Center, we recommend that you download drivers from the official website of your network card manufacturer (for example, Qualcomm or Realtek). You can also install drivers from the removable media provided by your hardware manufacturer. These drivers may be outdated, but the hardware should work, allowing you to download and install a more recent driver.
Restart the Windows DNS Client Service
Since Windows uses the DNS Client service for DNS caching and computer name registration, there is a possibility that this service may malfunction and need to be restarted.
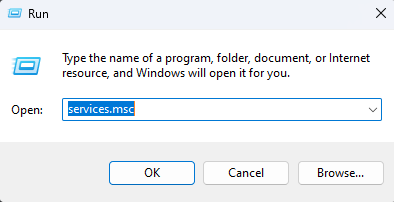
- Press Win+R on your keyboard. The Run dialog box opens.
- Type services.msc and press Enter. A window containing all Windows services will appear.
- Scroll down to find the DNS Client.
- Right-click the DNS Client service and choose Stop. Wait a couple of seconds for the service to stop completely.
- Then right-click the DNS Client service and select Start to restart it. You can disable the service through the Windows configuration if the DNS client service settings are unavailable (as in our case).
- Press Win+R on your keyboard
- Type msconfig and press Enter.
- In the window that appears, click the Services tab.
- Sort the services by name to make the search easier and find the DNS Client.
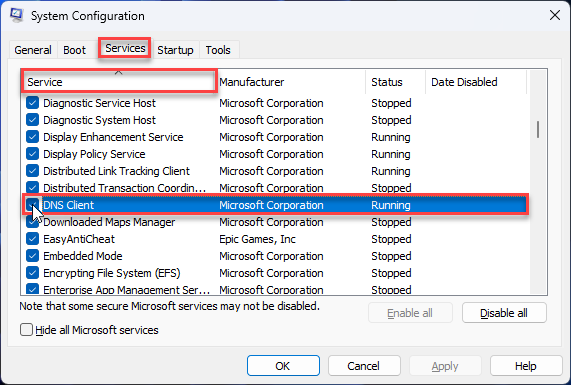
- Uncheck the DNS Client service and click OK to stop the service.
- Wait about a minute, then check the DNS Client checkbox.
- Click OK to restart the service.
Reset Winsock and IPv4 Settings
Suppose none of the above solutions worked. Then, you can reset Winsock and IPv4 settings to their defaults. This will reset most network settings to defaults and may fix conflicting configurations.
- Click Start and look for Command Prompt.
- Right-click and select Run as administrator.
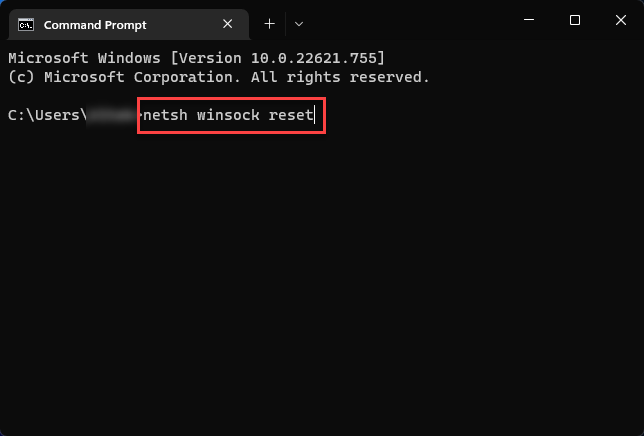
- Type or paste netsh winsock reset in command prompt and press Enter. This will reset Winsock.
- Reboot your computer.
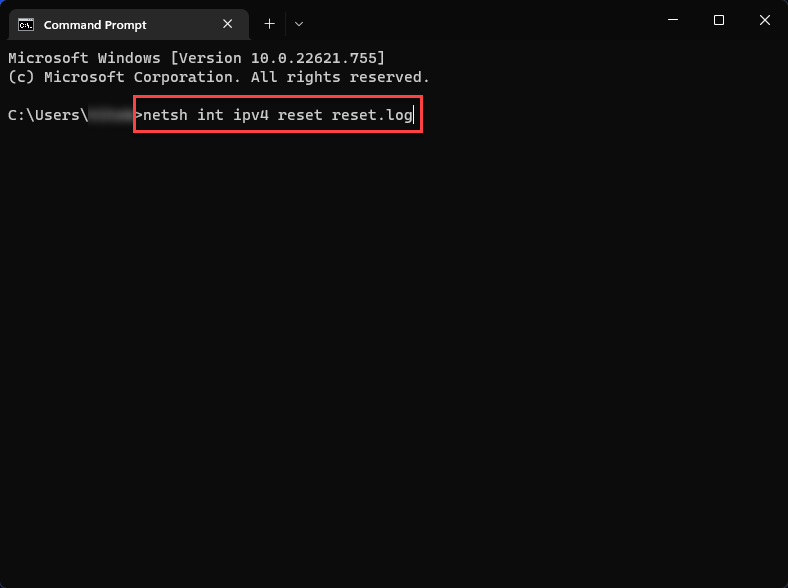
- Rerun the command line as an administrator and type or paste netsh int ipv4 reset reset.log
- Restart your PC and see if your problem is resolved.
 Is a real RED light for the different kinds of spyware
Following the above solutions, you should have fixed “Server IP Address Could Not Be Found“. Today you’ve learned how to check for website maintenance problems, clear the DNS cache, restart the DNS service, update network drivers and check proxy settings, and gain new skills. Most importantly, you can use all your favorite websites again.